Tools For Beginners
Builders with years of experience often find themselves in need of a new tool or device to build or run their robot, but there are a few things that all builders, even people using robot kits, will need. If you don't already have some of these tools you should strongly consider getting them.
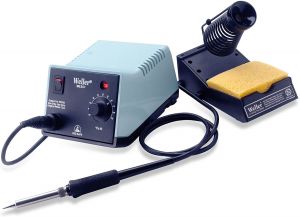
Soldering Station
Mastering soldering can be difficult but if you don't have the right tools, even with many hours of practice you'll never become proficient. There are a lot of beginners guides to help you with the basics. There are a lot of inexpensive and worthless soldering stations out there. Consider getting a quality tool from a major manufacturer like Weller or Hakko. There are a lot of online guides comparing soldering stations.
The heat from soldering can sometimes damage components. One of the best ways to avoid this is to use leaded 60/40 (60% tin, 40% lead) rosin core solder. Some places will advocate for using lead-free solder but it's melting point is much higher and is much more difficult to use. Another thing to consider getting is a pair of Helping Hands. Typically you will need to hold onto three or four pieces (wire, motor, solder, iron) to solder and this can be difficult with two hands. Helping Hands will hold the pieces you are soldering together for you so you can concentrate on just getting a good solder joint.
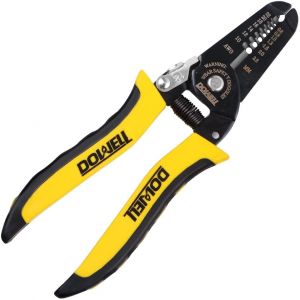
Wire Cutters - Strippers
For smaller robots, you can get by with a pair of scissors to cut your wires and a sharp knife to strip off the insulation, but it can be difficult to strip the insulation without damaging the underlying wire. A proper wire stripper will make this job easier. A pliers-style wire stripper (as shown) is quick and convenient; just make sure it can handle the size of wire you are using. Squeeze-action 'automatic' wire strippers tend to work better for larger wires.
Drivers / Wrenches
Nearly all bots use some fasteners to hold things together. Hex key or Allen key fasteners are the most popular since the fastener heads aren't as susceptible to damage as Phillips head fasteners. These come in many different styles and lengths for different uses. If your bot design requires you to remove a lot of fasteners to access the internals, consider getting a set that can attach to an electric drill or screwdriver.
Drills
Electric drills are needed to make holes, to prepare material to be tapped (threaded for fasteners), and can also be used to quickly take your bot apart and put it together while making repairs and changes during an event. The quality and price of drills cover a huge range. Cheap drills are fine if you are only drilling aluminum or plastic, but they don't tend to last as long. If you are going to be drilling into steel or titanium you should get a higher quality drill from a brand name company. Consider getting a spare battery so that you won't run out of power during an event. While drills can be used to insert or remove fasteners from your bot, a large drill can be awkward to use with tiny robots; consider getting an electric screwdriver instead.
Cutting tools
Being able to cut material is important when creating and repairing your robot. There are many manual and electric cutting tools available. One that is useful for all robots of all sizes is a rotary tool or Dremel. Although rotary tools have many different blades and wheels for cutting, abrasive disks are particularly useful.
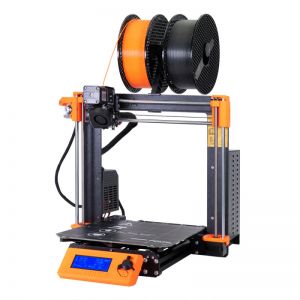
3D printer
A 3D printer, which produces plastic parts under computer control, can be a helpful tool. There are dozens of robot designs on Thingiverse which you can download and print; typically these will include several parts that are assembled to become the body of the robot, and many have instructions and buying suggestions for finishing the working parts. Once you've got a bot design working to your satisfaction, you can print a supply of replacement plastic parts, which can be used for repairs after your bot becomes damaged.
3D printing is especially useful for the smaller insect-class bots, where weight is a severe limitation to design. Not all printable plastics are alike, though. The list below proceeds roughly from weakest to strongest.
- PLA is inexpensive, but brittle.[1] It is the most common 3D printing filament. It rarely warps in use and is great for tiny parts.[2] It's a great starter material, and recommended for printing prototype parts. Many builders prefer other plastics, especially for their active weapons or armor.
- PLA+, a modified PLA with additives, may be stronger. With an acrylic component, for instance, it may show much better impact resistance.[3] Inland and eSun claim their PLA+ products are 10x stronger than regular PLA.
- PETG (a copolyester) is more heat resistant, more flexible, and less brittle than PLA.[4] It is well suited for 3D printing mechanical parts. It is more likely to flex under impact.
- ABS is a strong and reasonably impact-resistant material at a moderate price, but warps easily and smells worse while printing. You'll probably need to print it in an enclosure for best results.
- Nylon is tough and flexible. Regular nylon is hygroscopic and should be kept in dry storage; consider buying a hybrid nylon material that doesn't absorb water as easily.
- Polycarbonate is super strong - your robot arena walls are probably made from it! Many printers can't print it, though, because it must be heated to an extreme temperature.
- Carbon-fiber reinforced materials are extremely tough, and ideal for combat robotics. These are usually polycarbonate or nylon with chopped fibers embedded inside. You should strongly consider using these when plastic parts are needed for beetleweight designs.[5] This material requires a durable printing nozzle, as the carbon-fiber strands or particles are highly abrasive.
Tips:
- Nearly all 3D printers can handle PLA. Check the specifications and instructions of your printer to learn how to use the other, more exotic materials.
- A basic limitation of 3D printed parts is that they can crack or break apart along layer lines, since they are made from layers of plastic. In general, though, the tougher the plastic the more likely it will hold together.
- Pay attention to the orientation of parts printed on the bed - consider orienting parts so that the direction that needs to be the strongs goes horizontall during prining.
- You can make adjustments before printing. Thicker walls (shells) and a higher percentage of infill add density and strength to your bot, but also increase weight.


